Registration for courses with participant restriction (usually seminars) takes place via the course and not via the module examination. The reason for this is that a fixed place is required for exam registration (in contrast to courses without participant restriction). You can identify the participant restriction by the fact that a course has fewer than 9999 places. Follow the instructions below to successfully register for an course examination.
Via the study programme areas if you scroll further down (recommended for mobile devices).
Note: Depending on your personal preference, you can use the study programme tree or go via the study programme areas, regardless of whether you are using a mobile device or a desktop. Below we present study programme tree on the desktop, which technically works just as well on a mobile device.
The path via the study programme areas is shown below (3).
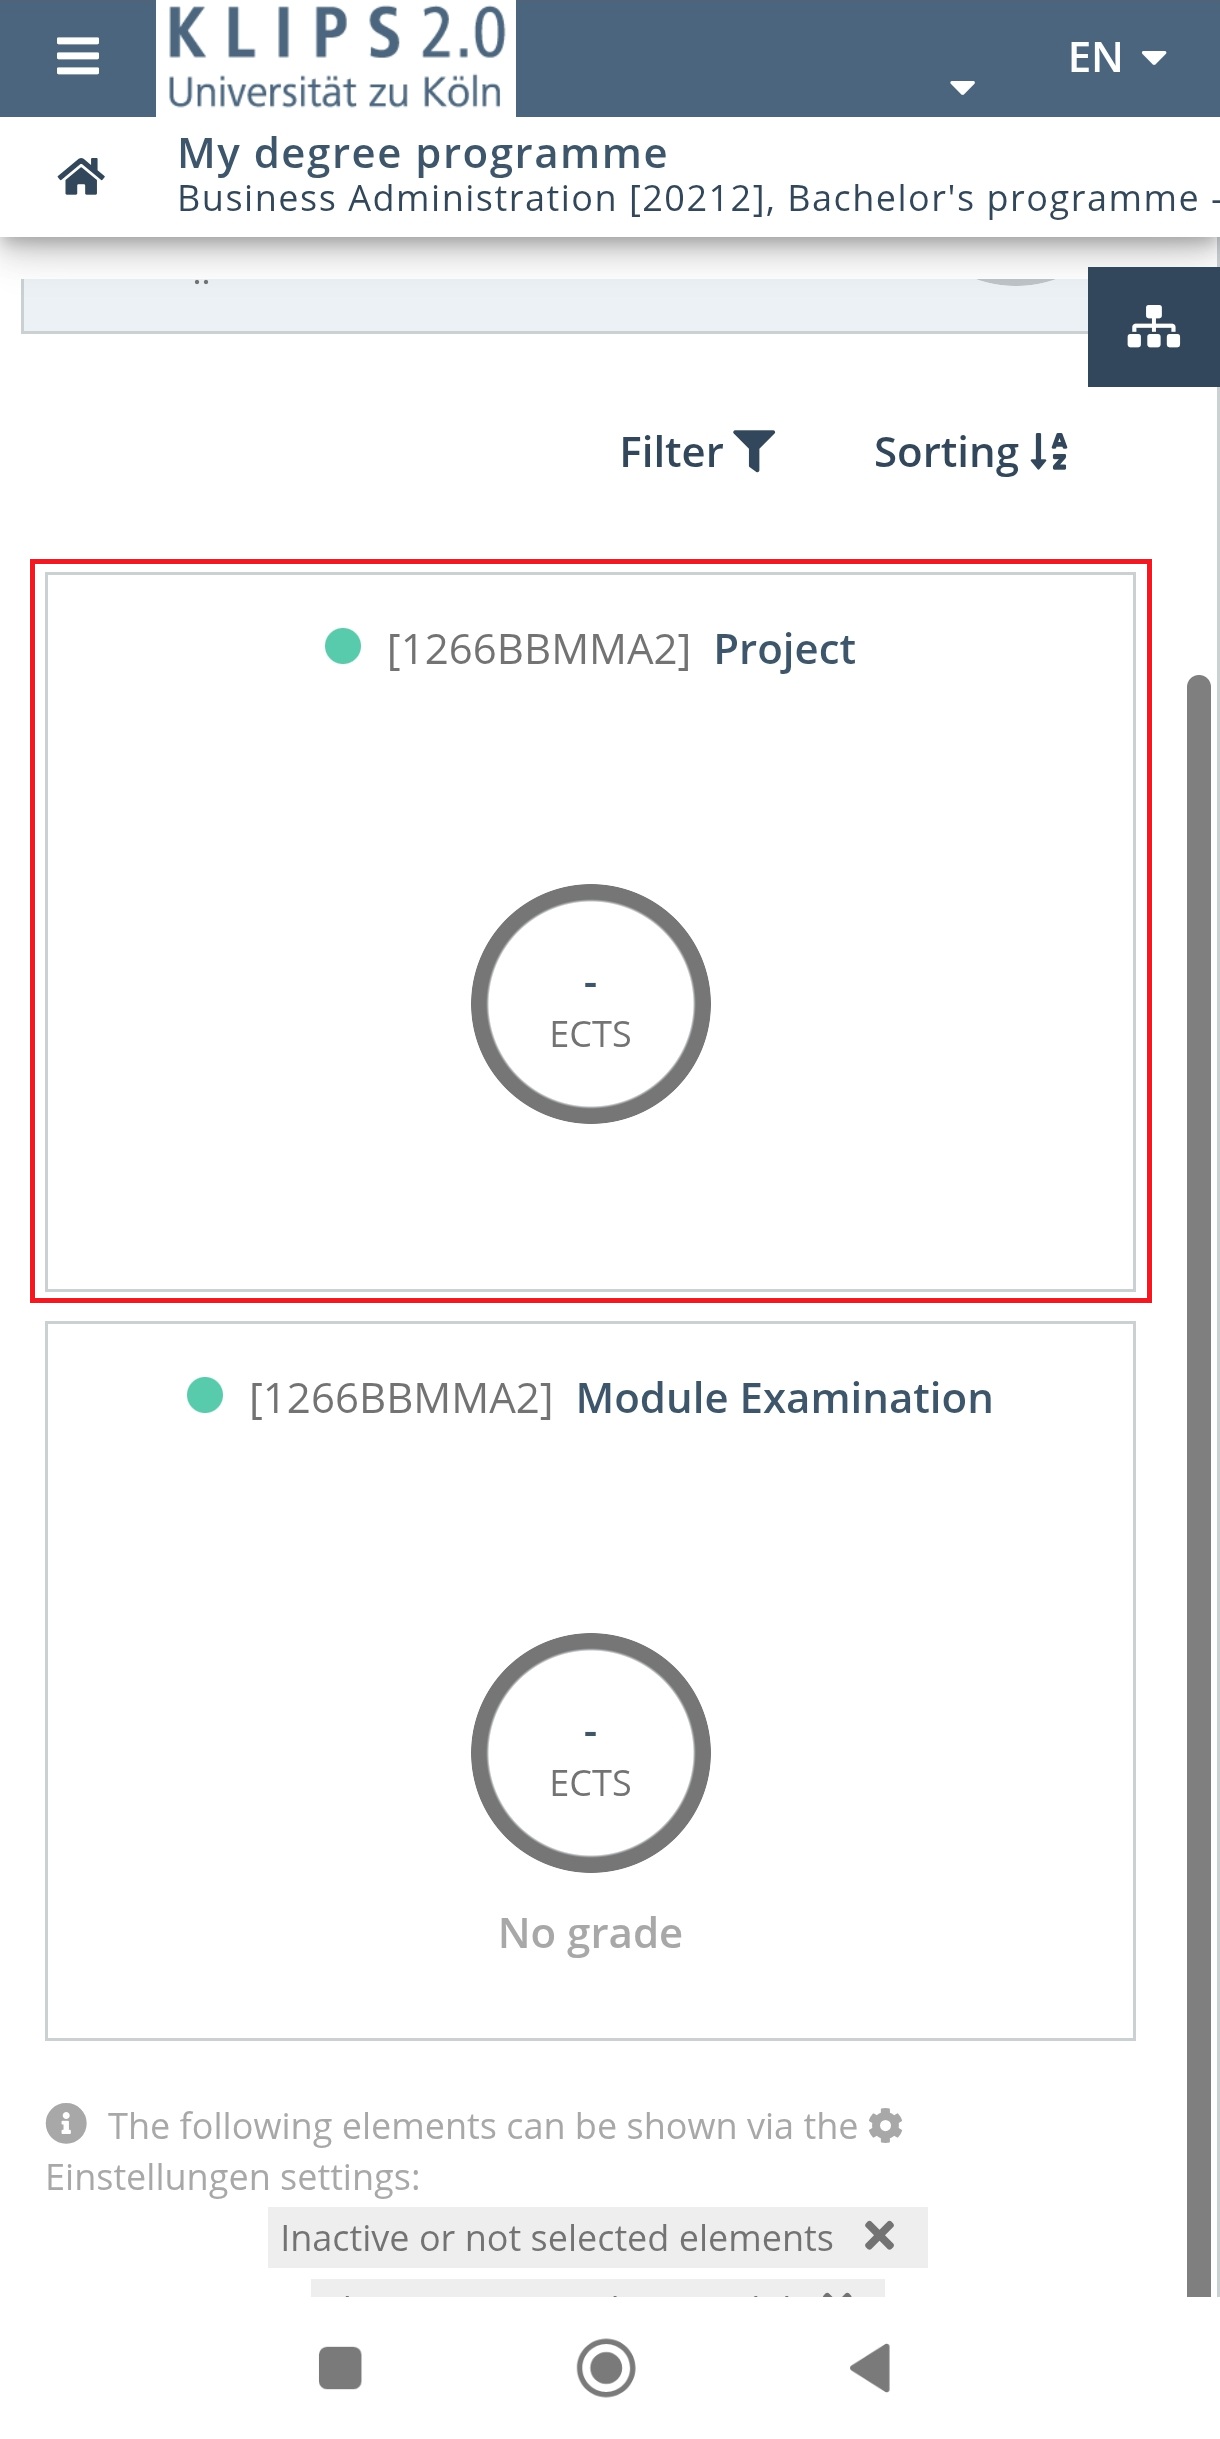
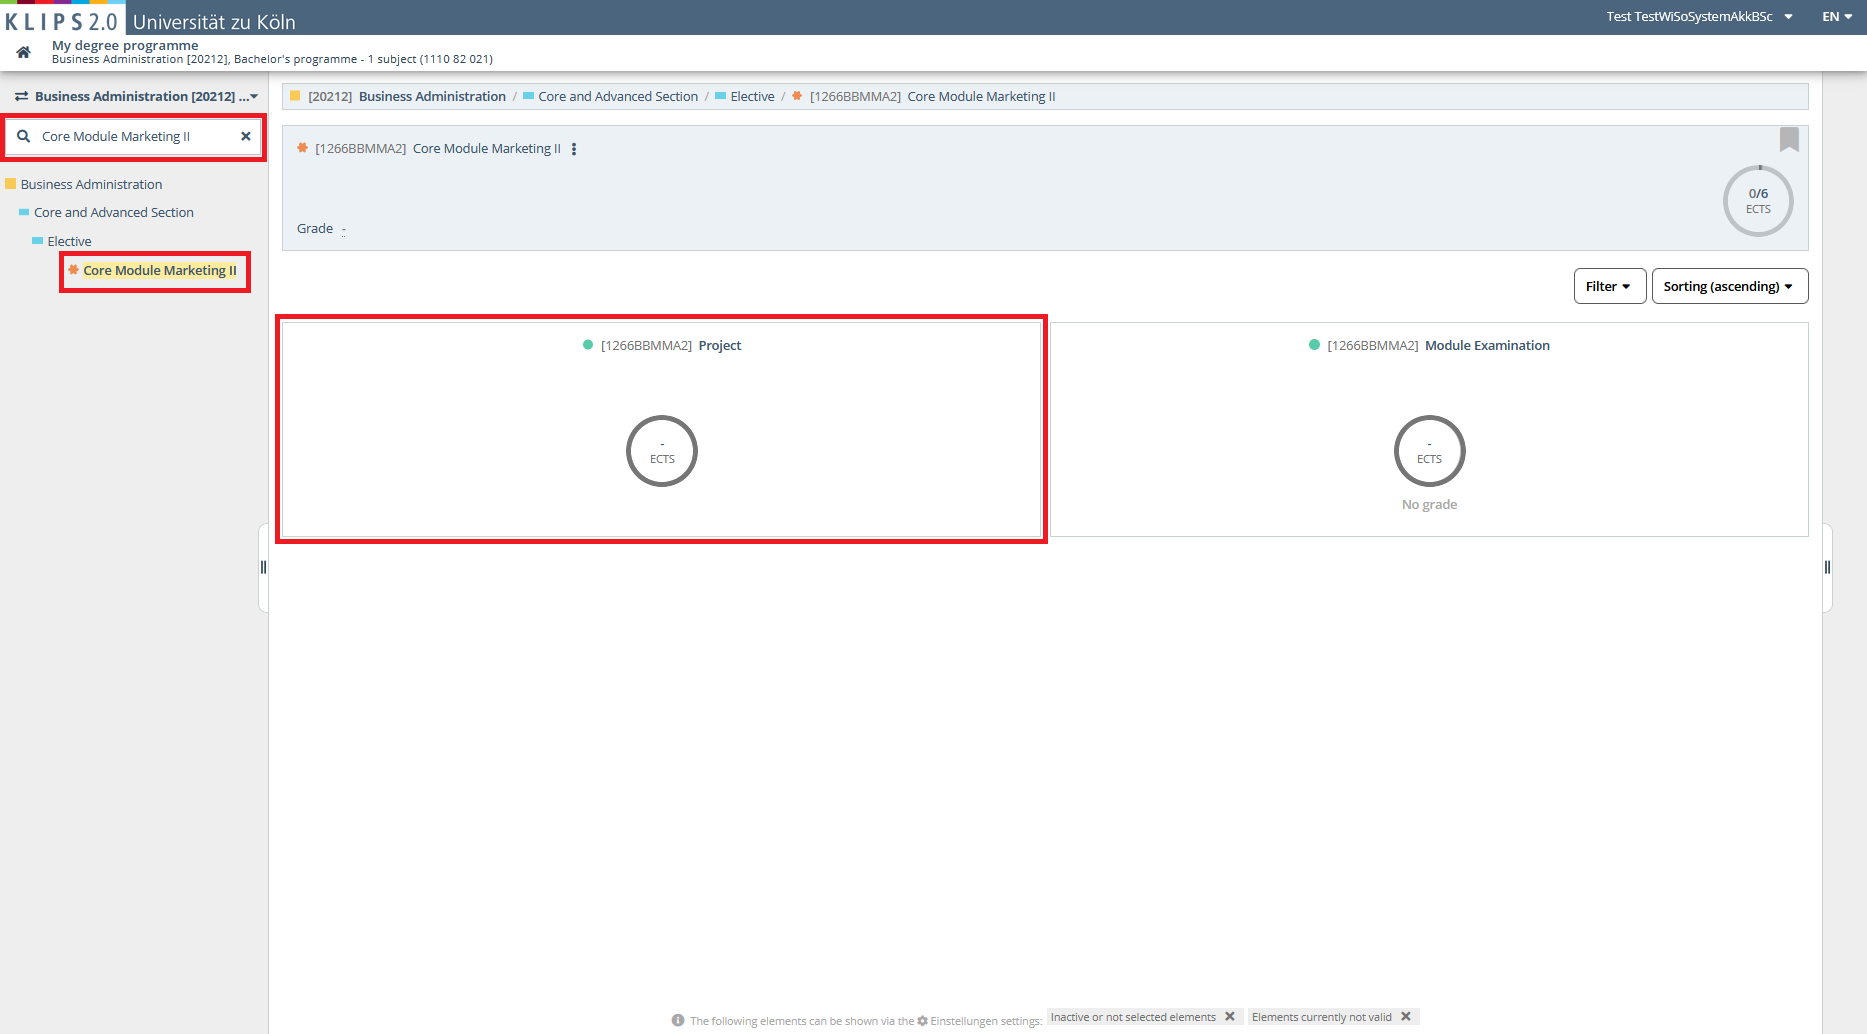
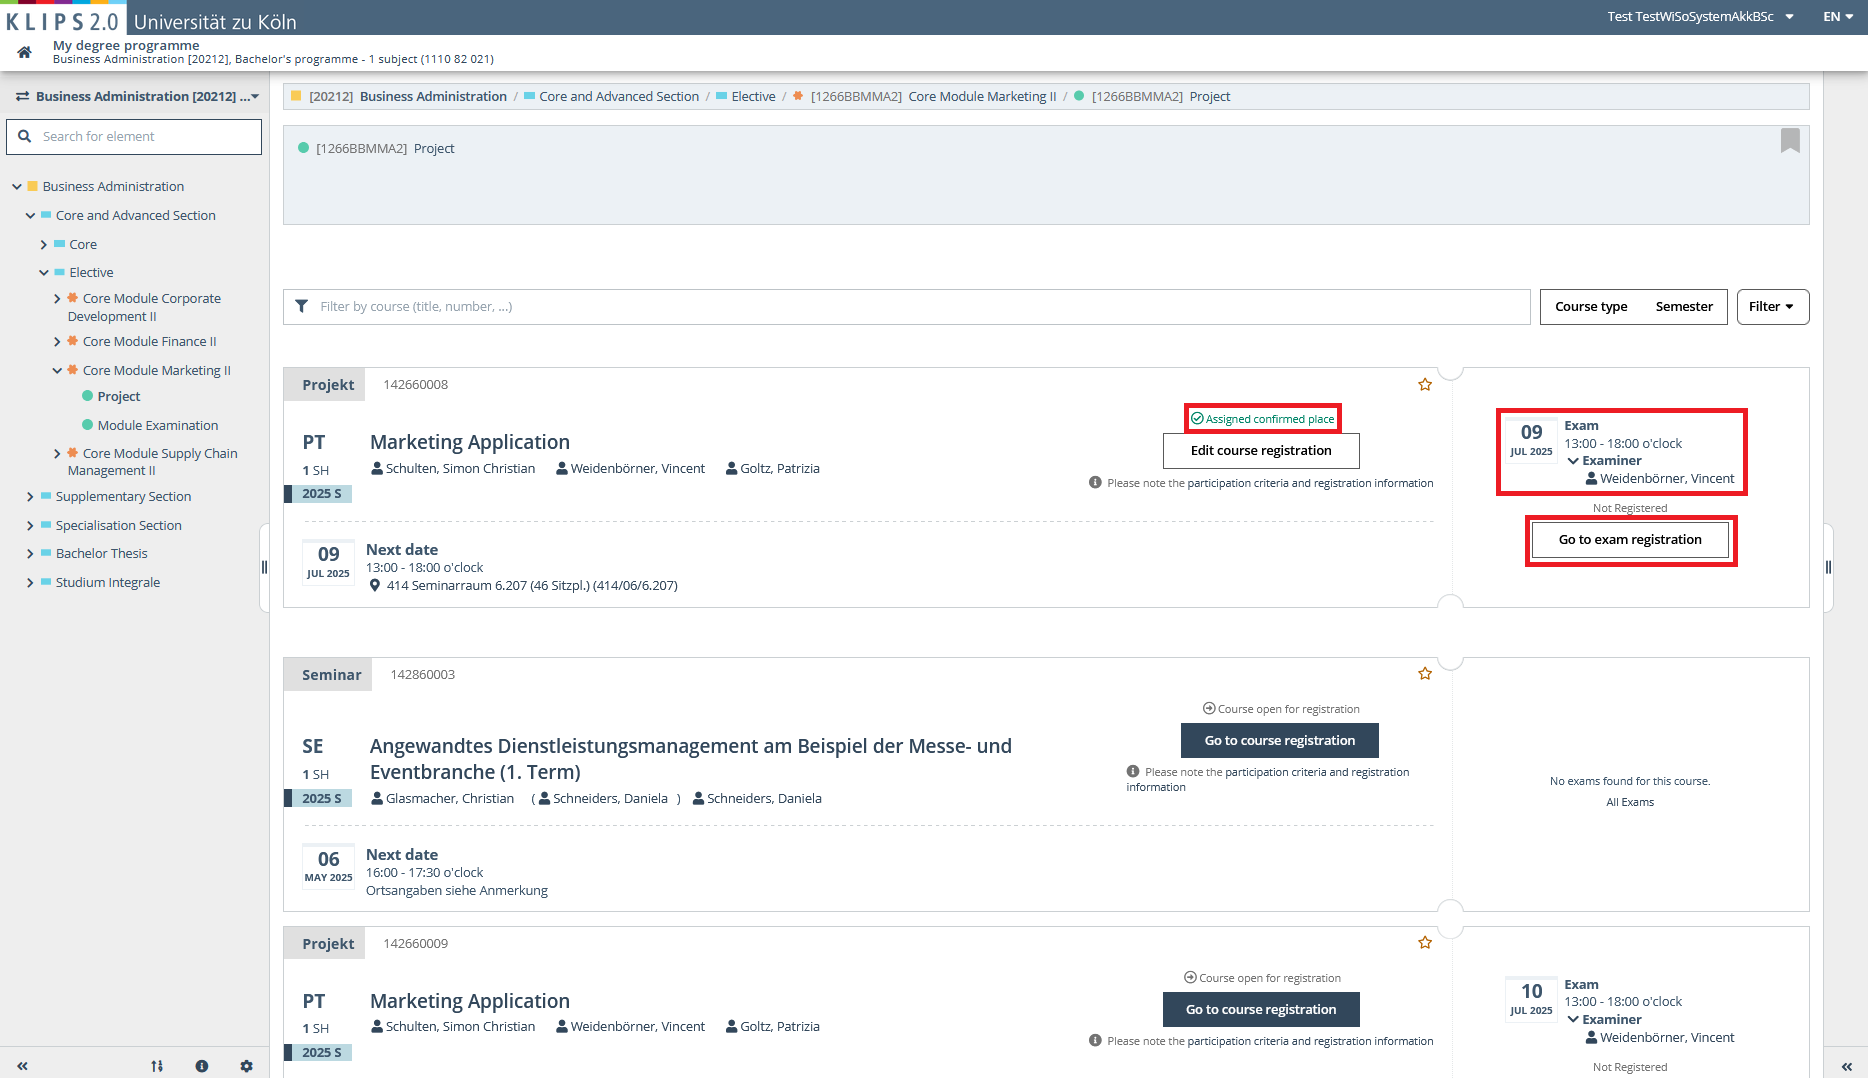
In the example, we would like to register for the examination of the core module Marketing II in the elective area of the core and advanced section of Business Administration. To do this, we click through to the course - the Project. CM Marketing II is a seminar and has a limited number of participants.
Note: the main difference between the module examination and the course (i.e. the Project) is that you have to select the course instead of the module examination.
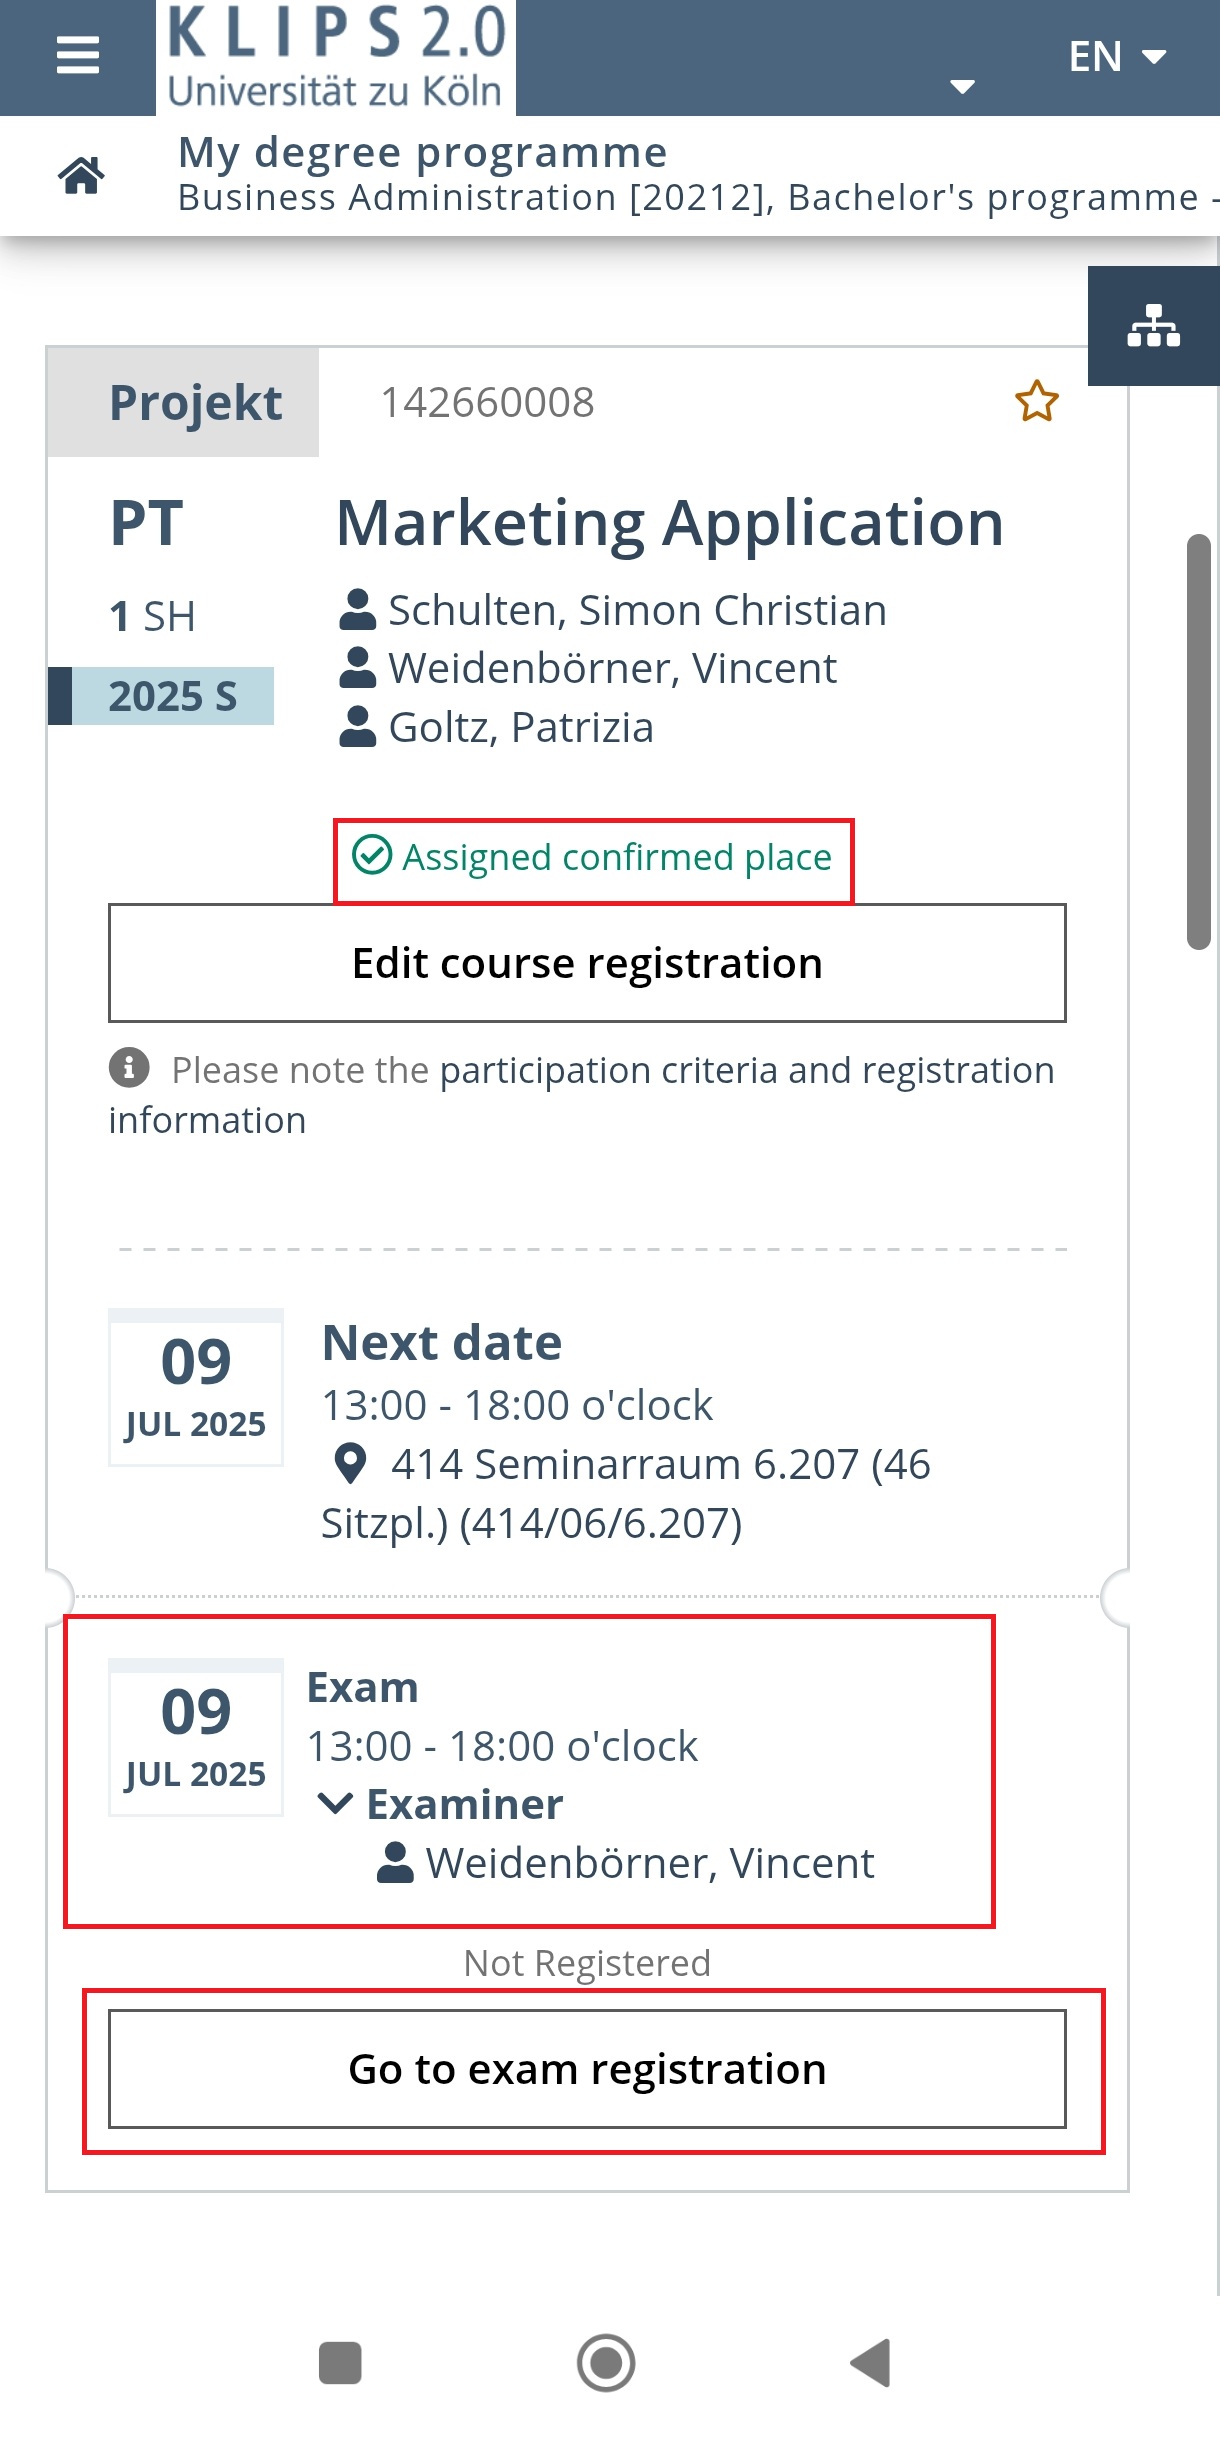
Once we have selected Project, we are at the course level. Here we find all the necessary information about the exam: the exam date, the time and the examiner.
Note: Modules (here: CM Marketing II) can contain several courses (in our example there are five seminars, which can be viewed by scrolling). However, only one seminar can be passed in order to complete this module. Therefore, there can only ever be one fixed place. In our example, we see that there is a fixed place in the seminar ‘Marketing Application’. This means that you can only register for an exam for this seminar during the registration period.
We click on the ‘Go to exam registration’ button below.
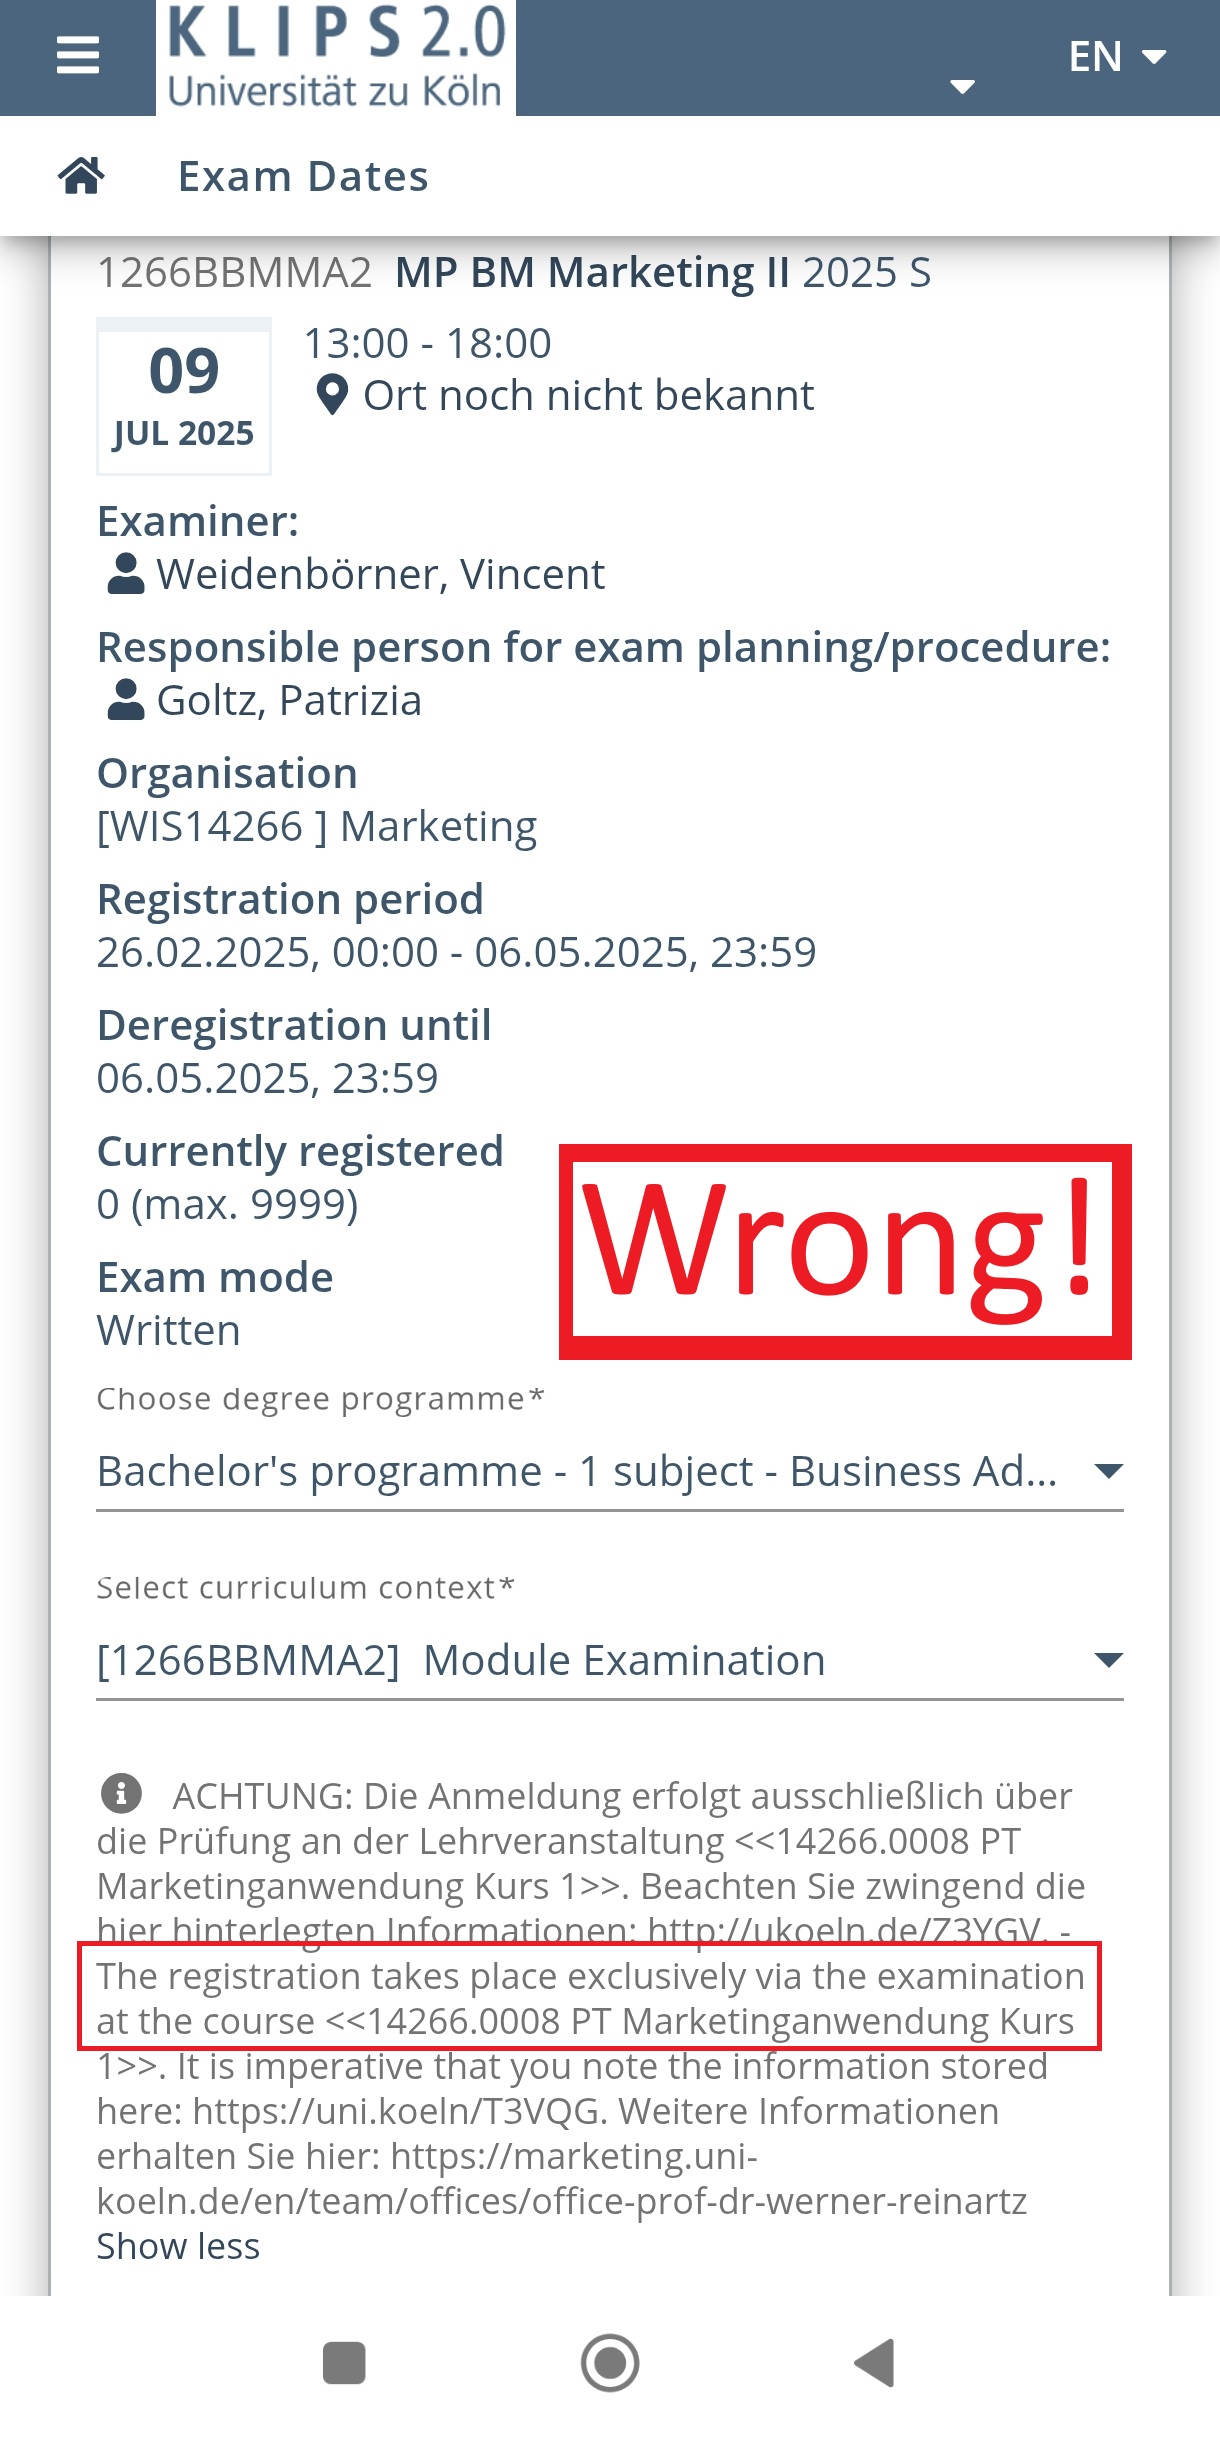
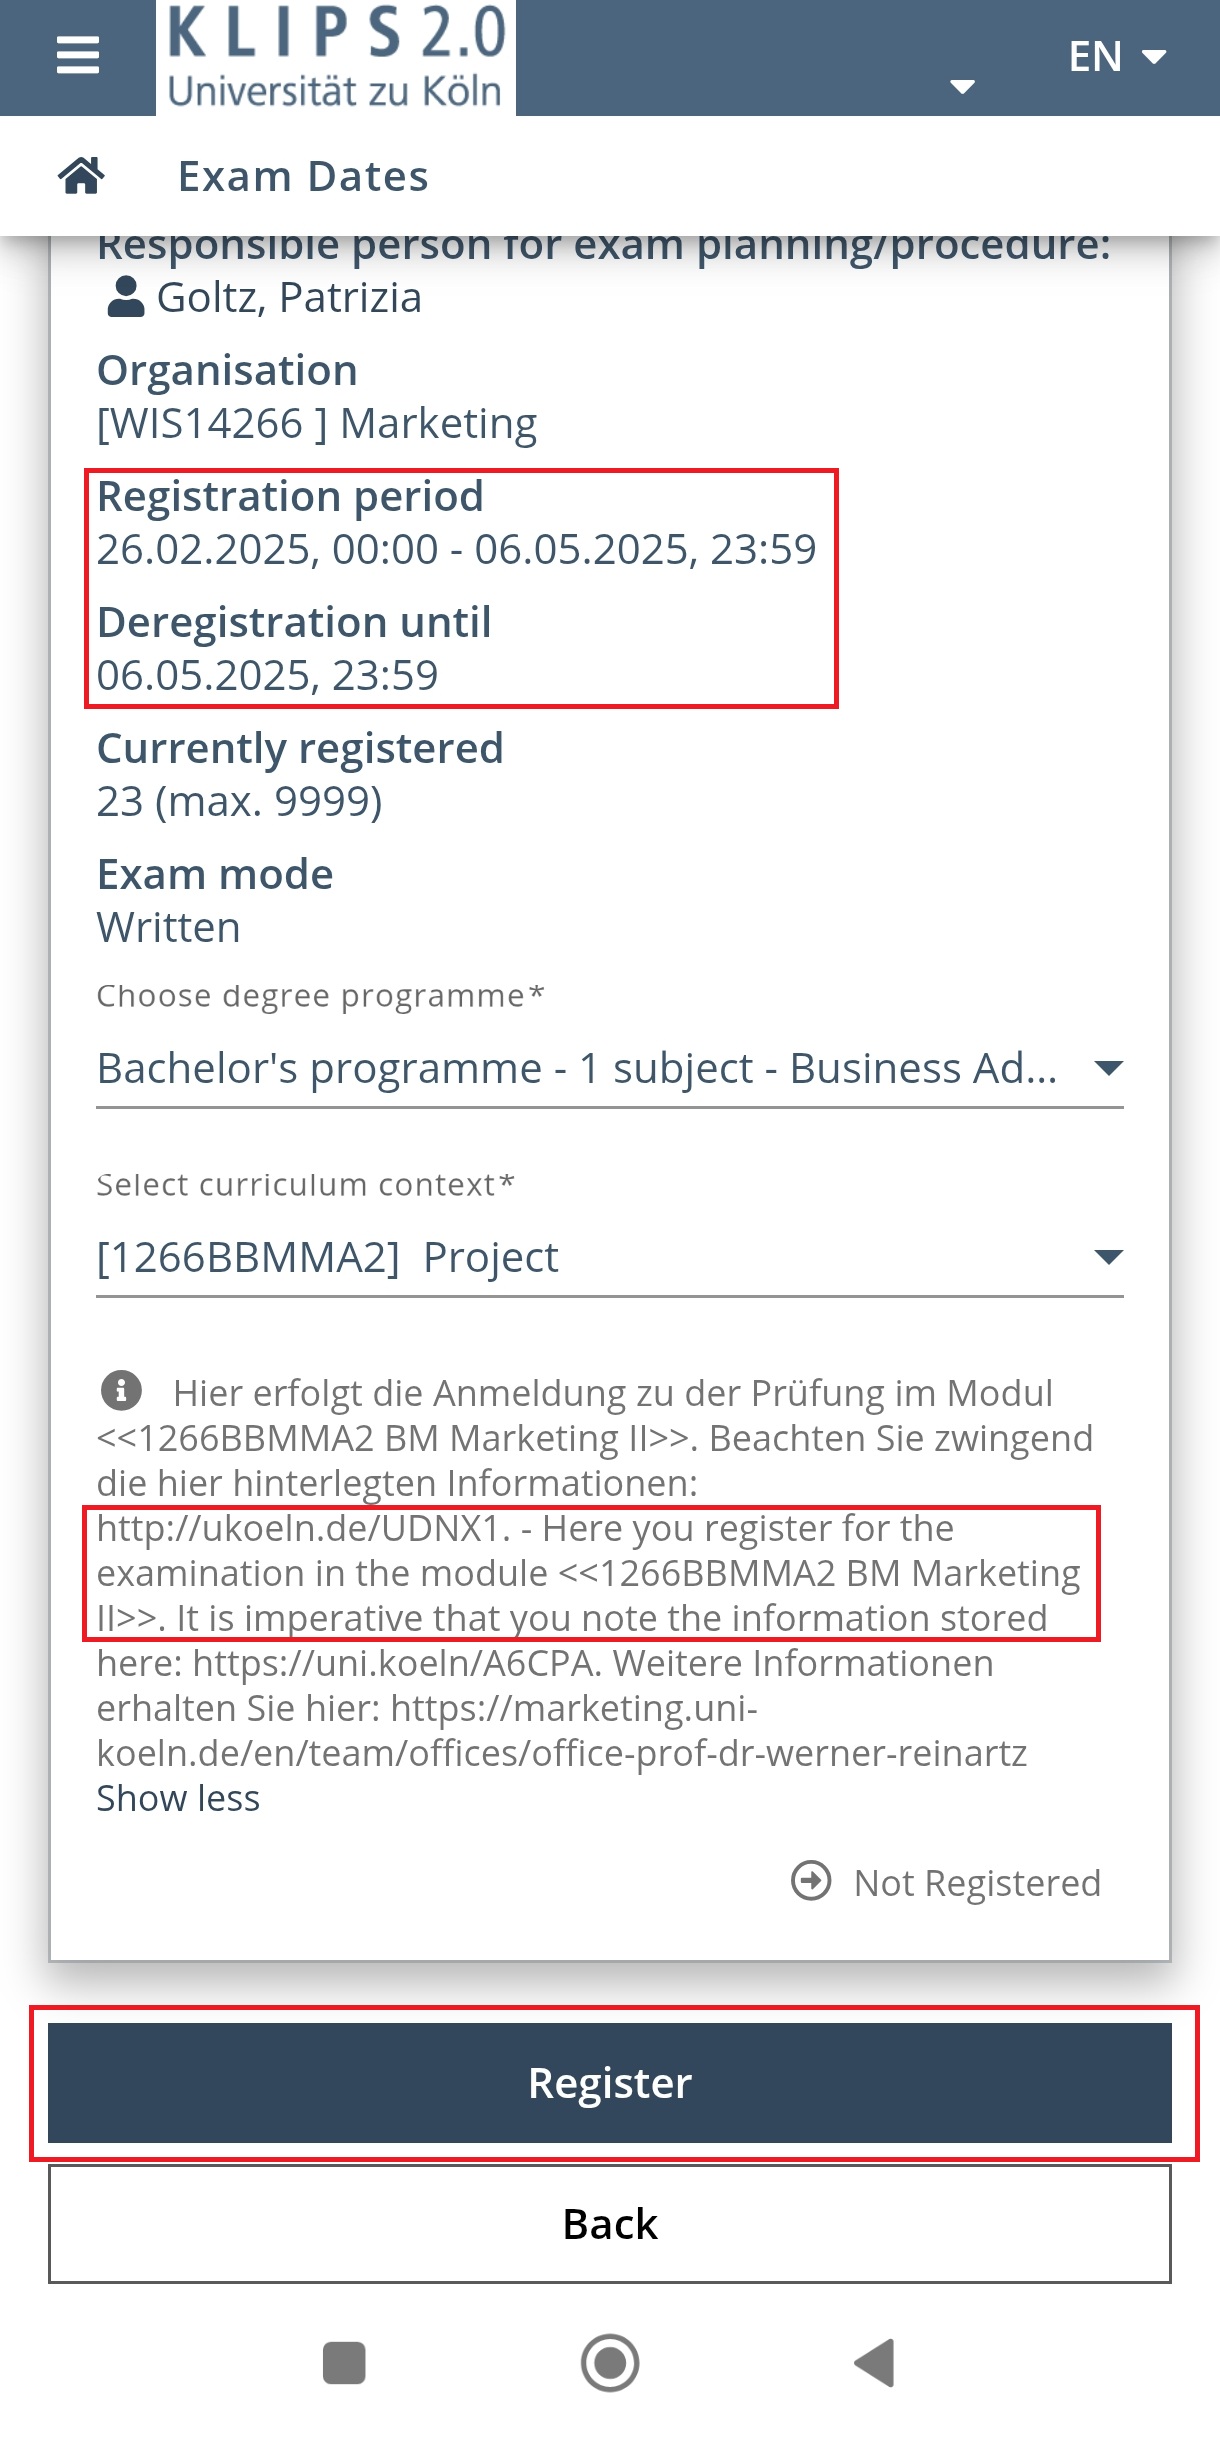
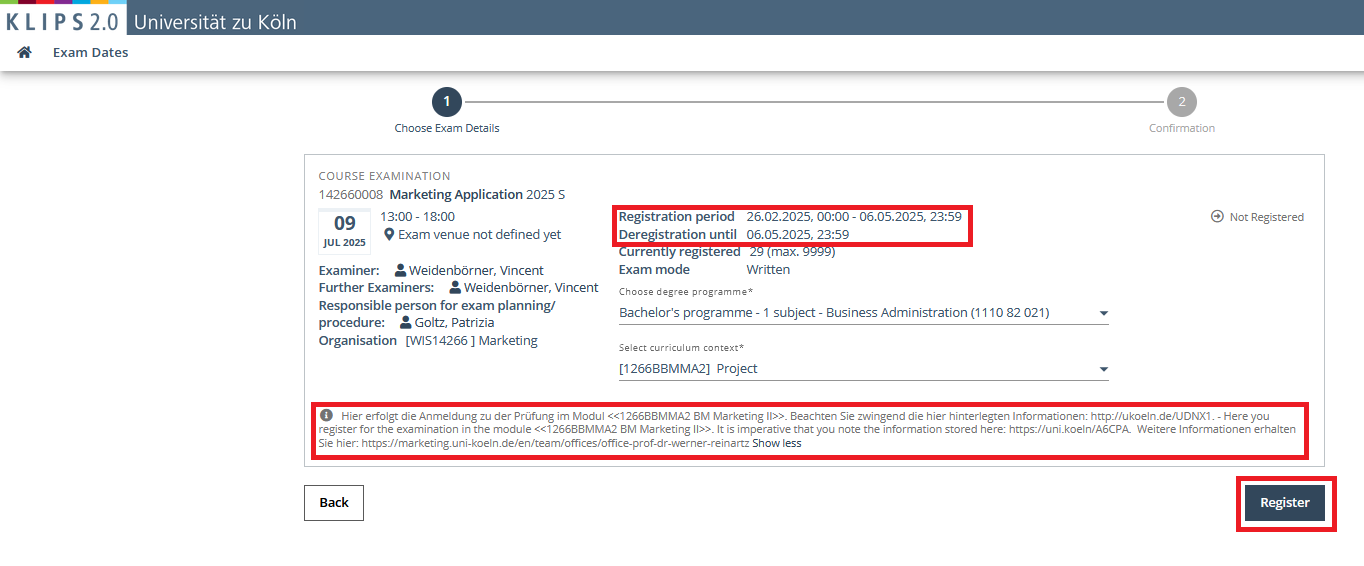
Here we can see all the important information about the exam at a glance. We can also see the registration and de-registration deadlines.
Important: Once the deadline has passed, it is no longer possible to register for or deregister from an exam.
We can also see in the fold-out information field that we are in the right place and can register for this exam. You will see a negative example of an attempt to register for CM Marketing II via the module examination in the next sreenshot. The fold-out information field here refers to the registration path via the course.
Advice: Always look at the additional information each time you register for an examination - regardless of the registration type.
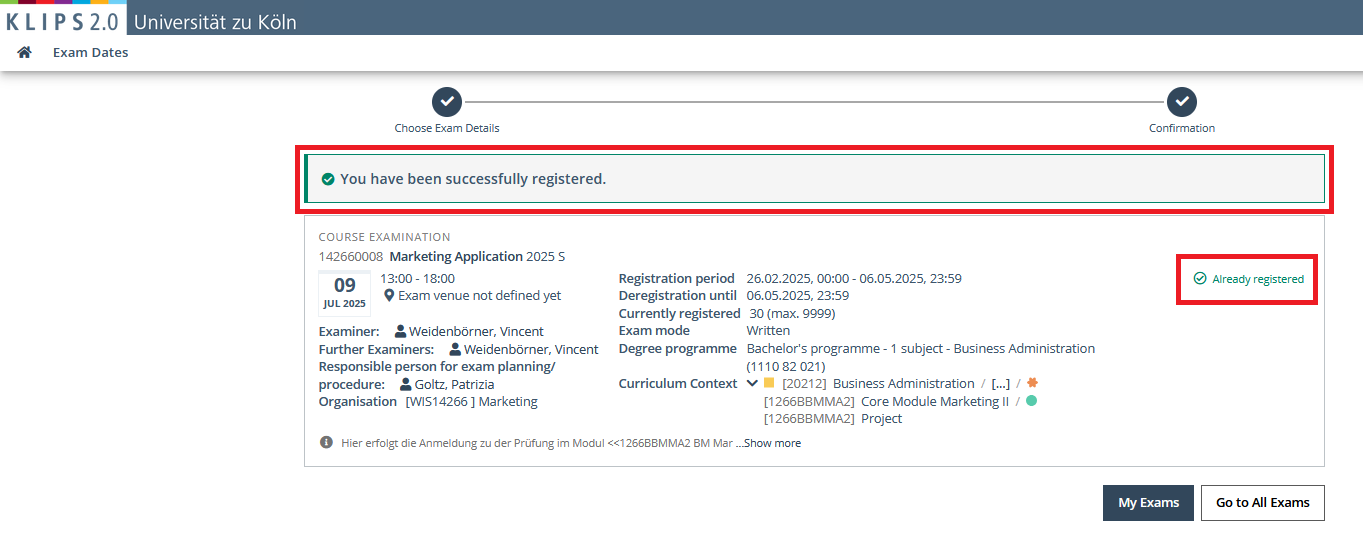
Click on the ‘Register’ button to register for the course examination. Two message windows will appear if the exam registration was successful.
Via the study programme areas if you scroll further down (recommended for mobile devices).
Note: Depending on your personal preference, you can use the study programme tree or go via the study programme areas, regardless of whether you are using a mobile device or a desktop. The registration path via the study programmes areas on the mobile device is shown above, which technically works in the same way for the desktop application.
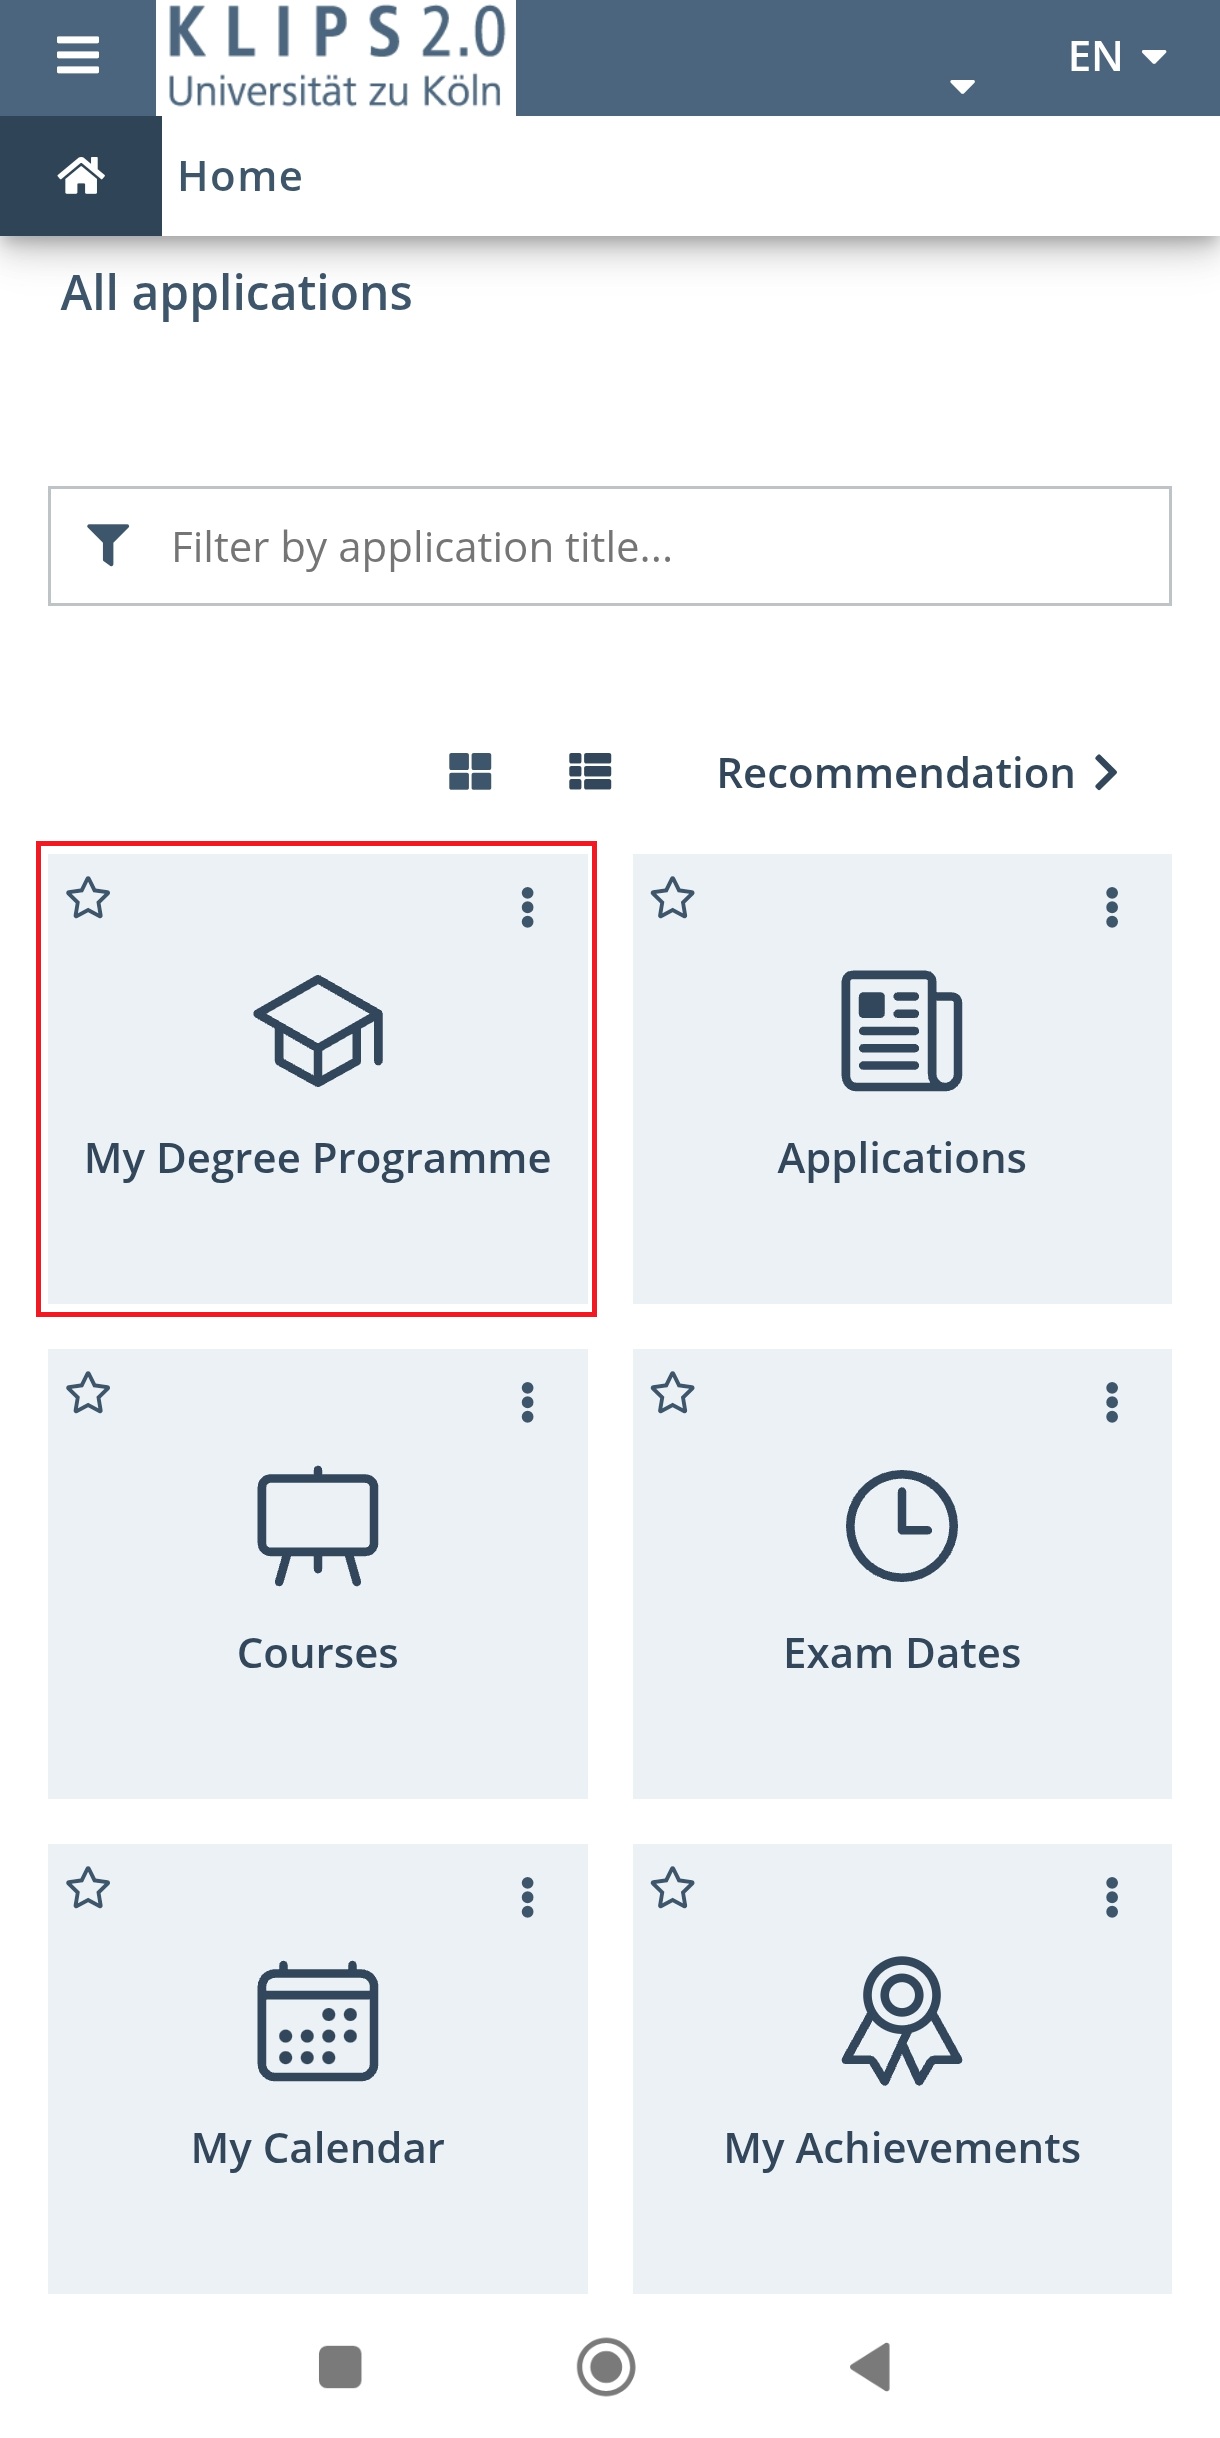
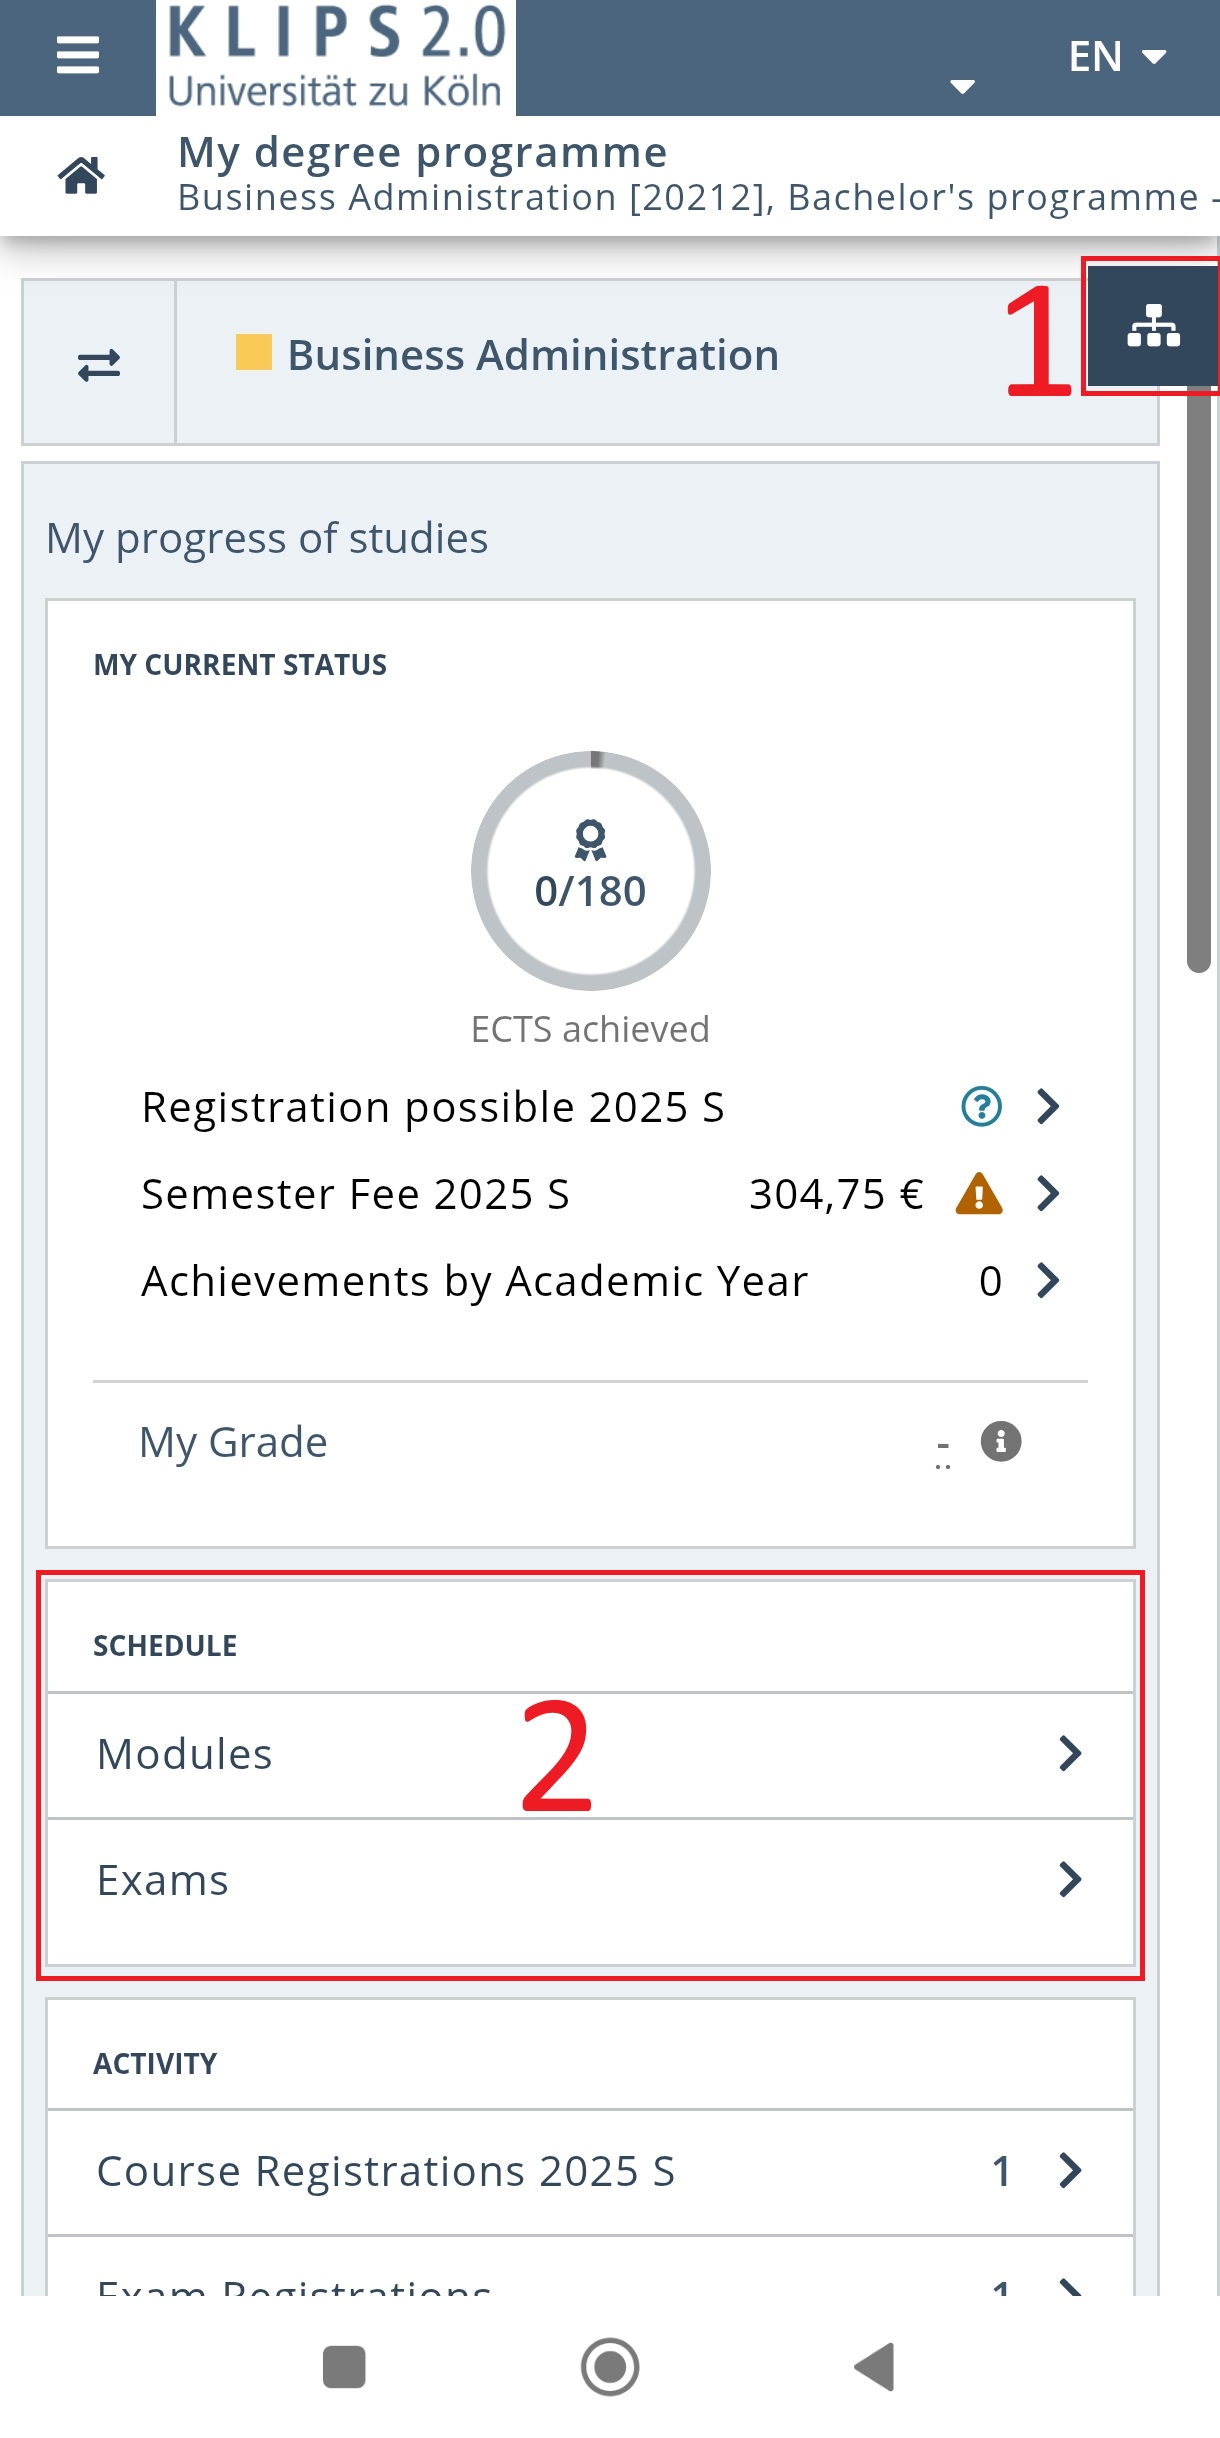
The path via the study programme tree is shown below (1).
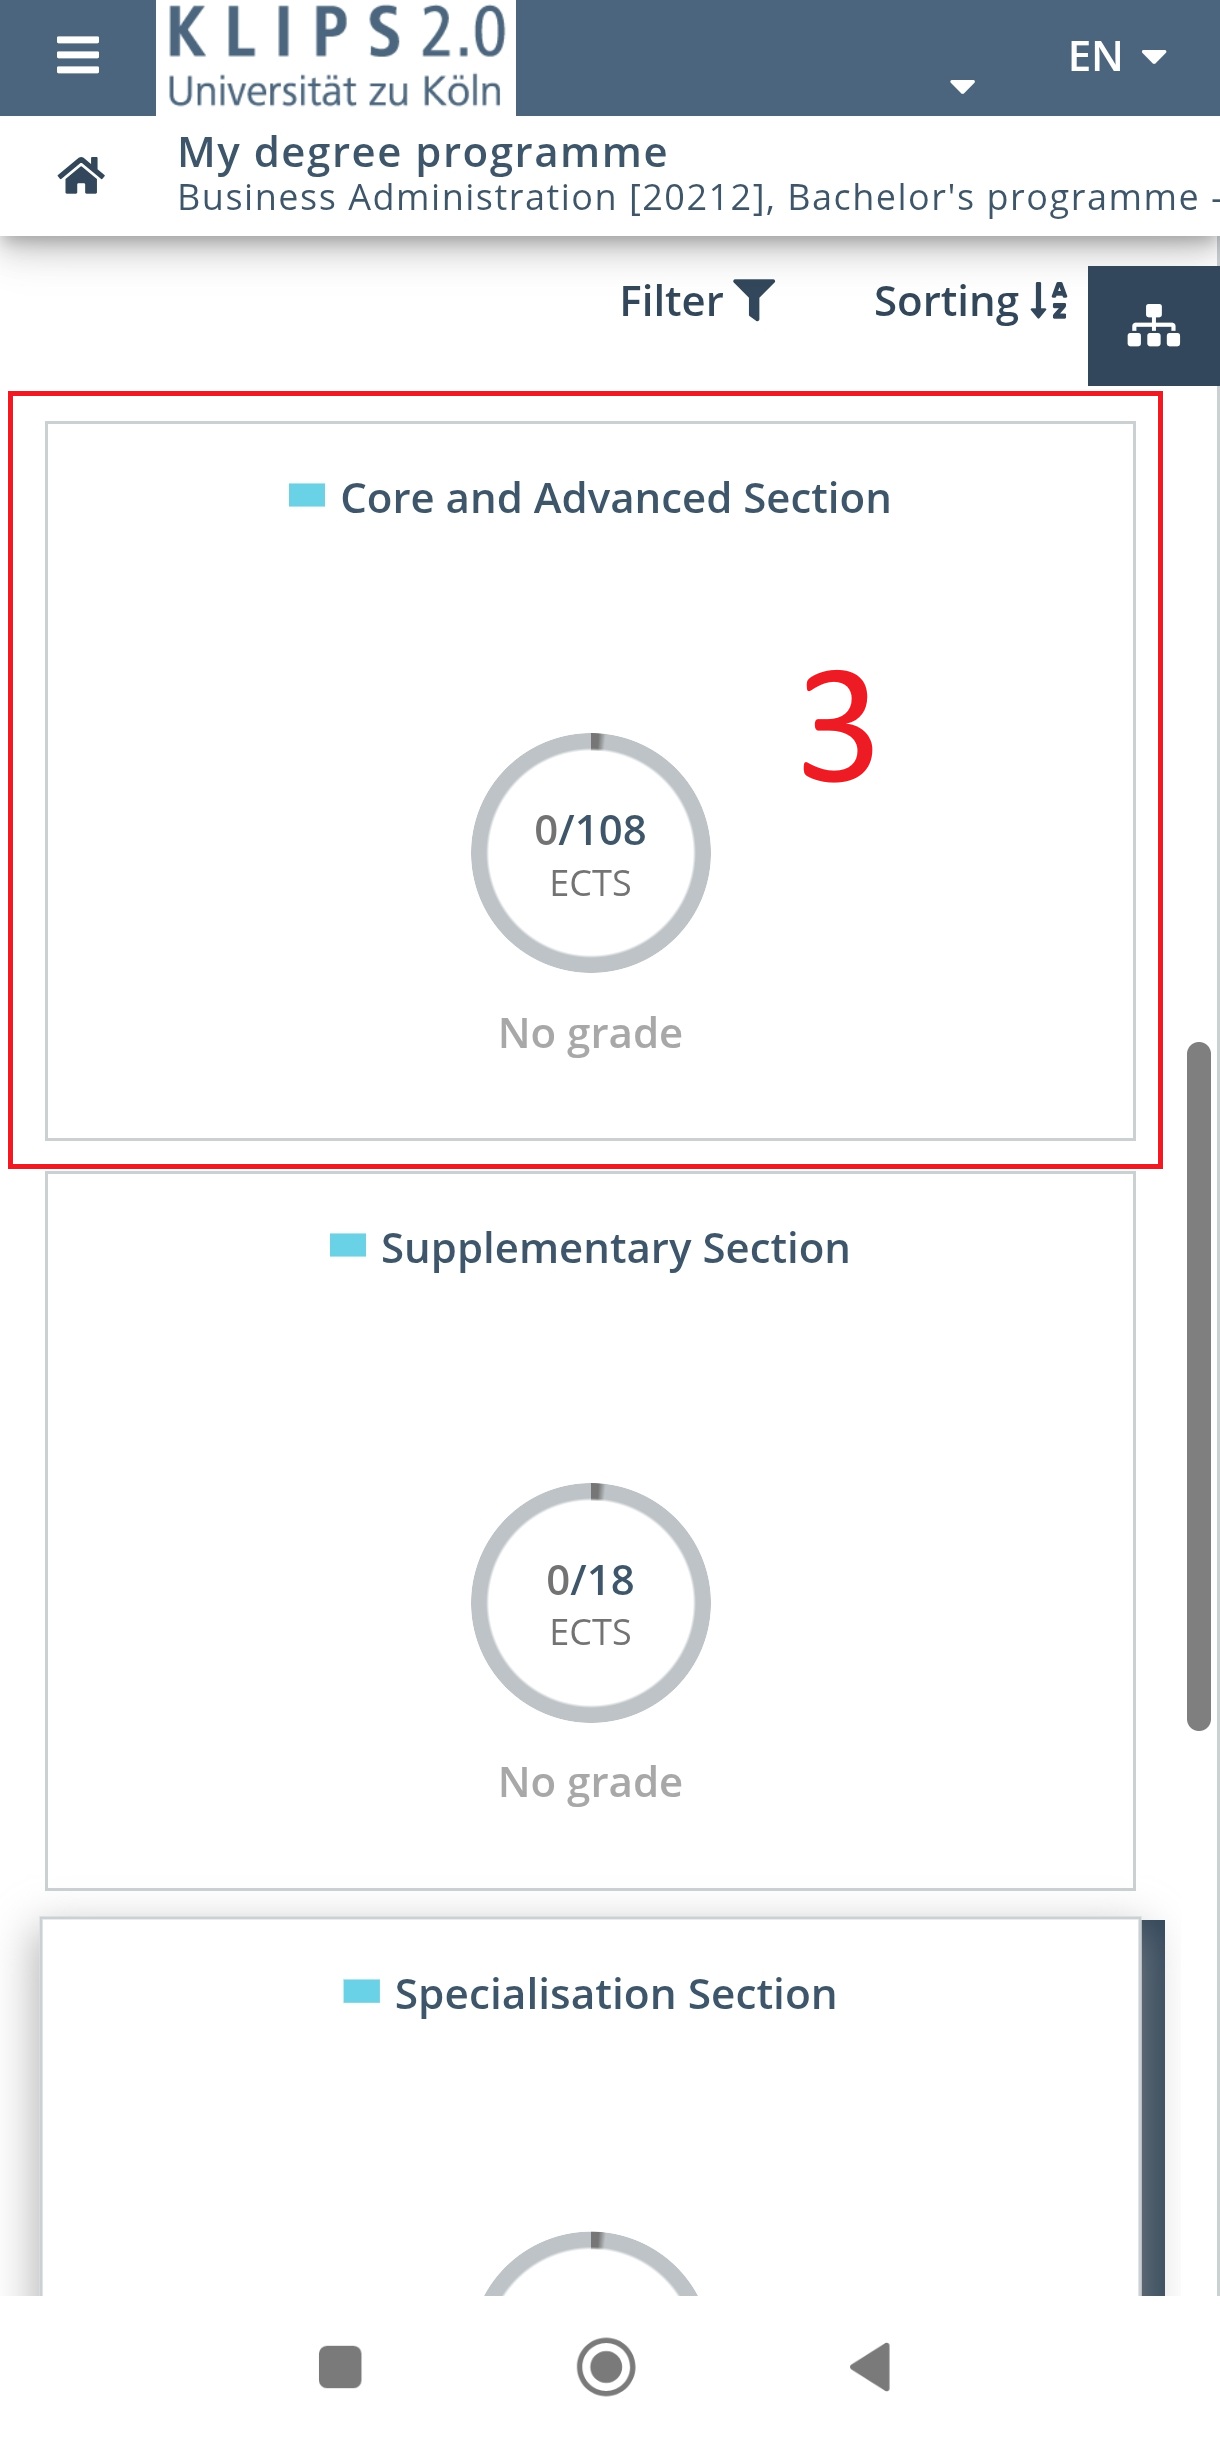
In the example, we would like to register for the examination of the core module Marketing II in the elective area of the core and advanced section of Business Administration. To do this, we click through to the course - the Project. CM Marketing II is a seminar and has a limited number of participants/seminar seats.
Alternatively, we can also use the search bar and then select the Project to the right of the study programme tree.
Note: the main difference between the module examination and the course (i.e. the Project) is that you have to select the course instead of the module examination.
Once we have selected Project, we are at the course level. Here we find all the necessary information about the exam: the exam date, the time and the examiner.
Note: Modules (here: CM Marketing II) can contain several courses (in our example there are five seminars, which can be viewed by scrolling). However, only one seminar can be passed in order to complete this module. Therefore, there can only ever be one fixed place. In our example, we see that there is a fixed place in the seminar ‘Marketing Application’. This means that you can only register for an exam for this seminar during the registration period.
We click on the ‘Go to exam registration’ button below.
Here we can see all the important information about the exam at a glance. We can also see the registration and de-registration deadlines.
Important: Once the deadline has passed, it is no longer possible to register for or deregister from an exam.
We can also see in the fold-out information field that we are in the right place and can register for this exam. You will see a negative example of an attempt to register for CM Marketing II via the module examination in the next screenshot. The fold-out information field here refers to the registration path via the course.
Advice: Always look at the additional information each time you register for an examination - regardless of the registration type.
Click on the ‘Register’ button to register for the course examination.